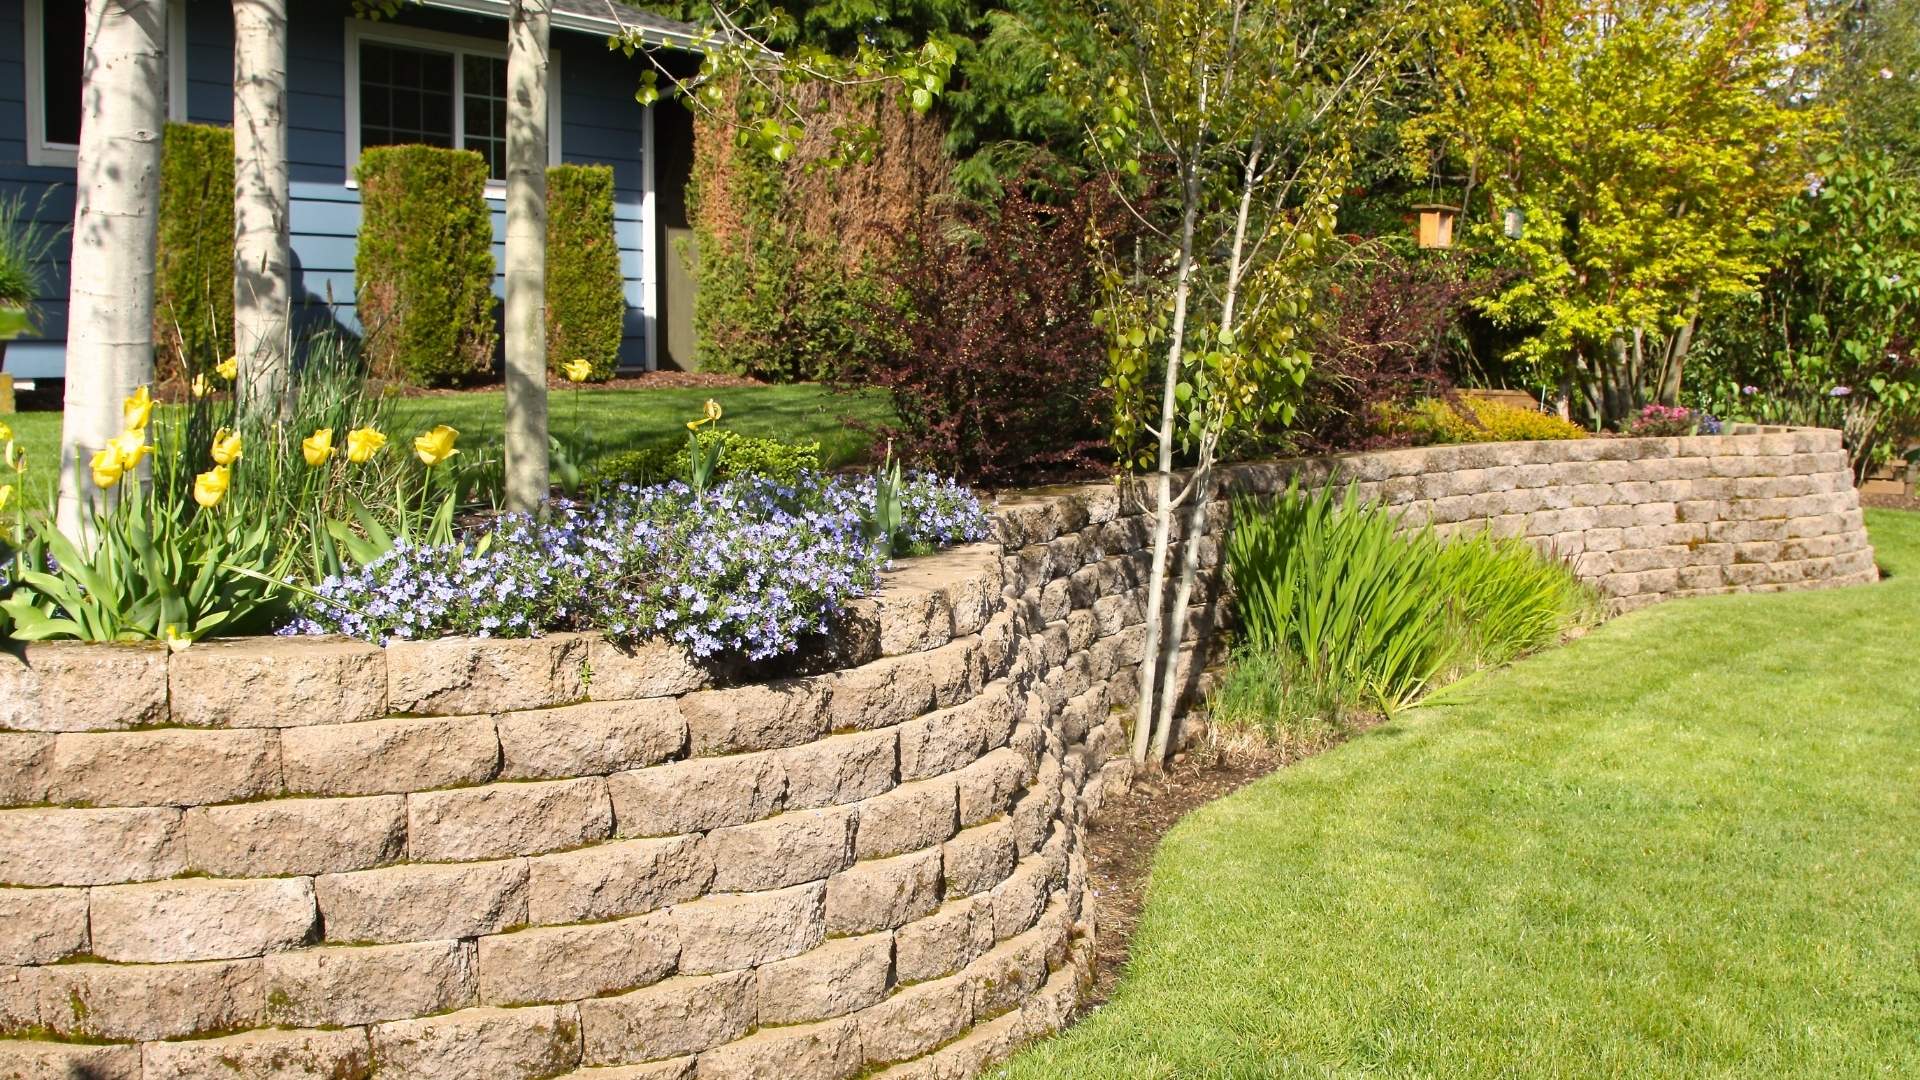
A natural stone retaining wall can solve a common Marietta yard problem. A slope that is hard to mow becomes a space you can use. Soil that keeps sliding after rain gets support.
The key is planning for weight and water before you move the first stone. If you skip the base or drainage, the wall can lean, bow, or settle unevenly over time.
In this guide, you will learn the practical steps that matter most, plus the points where DIY stops making sense. You will also get local context for Metro Atlanta yards, where clay soil and heavy rain can add pressure behind a wall.
Quick Look
Retaining walls solve slope issues by creating usable space, supporting soil, and reducing erosion risks.
Proper planning of layout, materials, and drainage is crucial to avoid settling, bowing, or shifting walls.
Key materials: Use gravel, geotextile fabric, and perforated pipes for effective water drainage behind the wall.
Cost drivers: Wall height, material type, site access, and drainage complexity significantly affect pricing.
Higginbotham Designs offers expert consultation to help you plan and execute retaining wall projects with proper drainage and design.
Decide If Your Wall Is a Safe DIY Project
A natural stone retaining wall can be a good DIY project when the wall is short, the ground is stable, and water is not building up behind the wall. Most homeowners run into problems when they build too high, skip compaction, or ignore drainage.
A simple rule: DIY is usually safest for shorter walls, especially dry-stack builds. Once you get into taller walls, steep slopes, or areas near driveways and foundations, the risk goes up fast. You can also run into permit rules and added design needs.
You should pause and get help if you see any of these:
The wall needs to be tall to level the yard
Water sits near the base after rain
The soil stays soft or washes out
The wall is close to a house, driveway, or fence line
You need to correct an existing leaning wall
If you still cannot decide whether your wall is a safe DIY project, you can get a free consultation from Higginbotham Designs. They can assess your slope, drainage, and layout, then help you choose a plan that fits your yard.
Check Rules Before You Dig in Cobb County and Nearby Cities
Before starting a project, check local rules to avoid hitting utilities and triggering permits. Here's what you need to know in Cobb County and nearby cities:
1. Call 811 first (this step is not optional)
Before any trenching, contact Georgia 811 to get underground utilities marked. This helps you avoid hitting power, gas, water, cable, or irrigation lines.
2. Cobb County rule you can use as a clear starting point
If your home is in unincorporated Cobb County, a retaining wall 30 inches or taller typically requires a permit. Plan for extra steps, such as a site plan and engineered documentation, when the wall height and site conditions call for it.
3. If your home is inside a city limit (Marietta, Smyrna, Kennesaw, Acworth)
City requirements may differ from county rules. Confirm your jurisdiction before starting. In Marietta, retaining wall permits are handled through the city’s online system.
Quick Site Check:
Confirm property line location
Check HOA restrictions
Plan water drainage to prevent flooding
For the safest permitting path, request a quote from Higginbotham Designs in Marietta, East Cobb, West Cobb, Smyrna, Kennesaw, Roswell, or Acworth.
Choose the Right Build Style: Dry-Stack vs Mortared Stone
The build style impacts difficulty, cost, and how the wall handles movement and water.
1. Dry-stack stone (common for shorter, simpler walls)
Stones are stacked without mortar, relying on weight, base, and drainage. It’s ideal for shorter walls that can handle small ground movements and easier repairs.
2. Mortared stone (tighter finish, different risks)
Mortar locks stones together for a tighter, more fixed finish. However, it doesn't eliminate base prep or drainage needs. If the wall moves, cracks can appear faster.
Quick cues to help you choose
Use dry-stack for simpler, shorter walls with a natural look.
Consider mortared stone for tighter joints and a fixed finish.
Opt for a contractor plan if height, water flow, or slope risks are uncertain.
Materials and Tools Checklist (What You Actually Need)

For a smooth natural stone retaining wall project, make sure to stage materials first and avoid changes that can affect the base or drainage.
Essential Materials:
Wall stone: Choose stones with at least one flat, stable face for the front.
Capstones: Larger, flatter stones for the top course.
Crushed gravel: Angular gravel compacts better than round stones.
Drainage gravel: Clean gravel for behind the wall.
Geotextile fabric: Prevents soil from clogging the drainage gravel.
Perforated drain pipe: Helps move water away from the wall.
Topsoil/landscape soil: For final grading.
Optional: Landscape adhesive for capstones (common with dry-stack caps).
Essential Tools:
Stakes & string line: For consistent, straight walls.
Tape measure & marking paint: For layout and trench marking.
4-foot level: Ensures the wall leans back slightly.
Shovel & spade: For digging and shaping the trench.
Hand tamper/plate compactor: To compact layers for stability.
Rubber mallet: To seat stones without cracking.
Wheelbarrow & buckets: For moving materials.
Work gloves & safety glasses: Protect against stone edges.
Quick Quality Checks:
Ensure enough large, stable pieces for the bottom course.
Have enough gravel for the base and drainage zones.
Plan for water exit from behind the wall.
For a personalized material plan based on your yard conditions in Marietta or nearby areas, request a quote from Higginbotham Designs.
Plan the Layout and Estimate Materials (So You Do Not Overbuy)
A well-planned layout helps keep your wall clean, minimizes stone waste, and identifies issues early, like uneven slopes or water-trapping low areas.
Step 1: Measure the wall length and planned height
Measure the wall’s length and height to hold back soil.
Mark the ends and run a string line to visualize the wall’s face.
For uneven slopes, measure in multiple spots and use the highest point for planning.
Step 2: Decide on a straight, curved, or terraced layout
Straight walls: Simple and fast to stack.
Curved walls: Look natural but take more time and stone selection.
Terraced walls: Split one tall wall into two shorter walls, reducing risk, especially when height is a concern.
Step 3: Estimate stone and gravel with a simple method
Use this quick approach to get close, then add a buffer for waste and stone selection.
Stone estimate (simple)
Calculate wall face area: length × height (in square feet).
Add extra for the buried base course and stone selection: 10 to 20 percent is a common buffer.
Gravel estimate (simple)
Plan for gravel in two zones:
Base gravel under the wall
Drainage gravel behind the wall
Your trench width, base thickness, and backfill depth set the amount. If access is tight or the wall curves, expect more material handling.
Step 4: Plan access and staging
Choose drop-off points for stone and gravel.
Ensure a clear path for wheelbarrows and stage larger stones closest to the wall line for easy access.
Now that your layout and rough quantities are set, the next step is building a base that stays compact and drains well.
Build It Step by Step (Natural Stone Retaining Wall)
This section walks you through the core build process. The goal is simple: create a stable base, control water, and stack stone so the wall leans slightly into the soil it holds back.
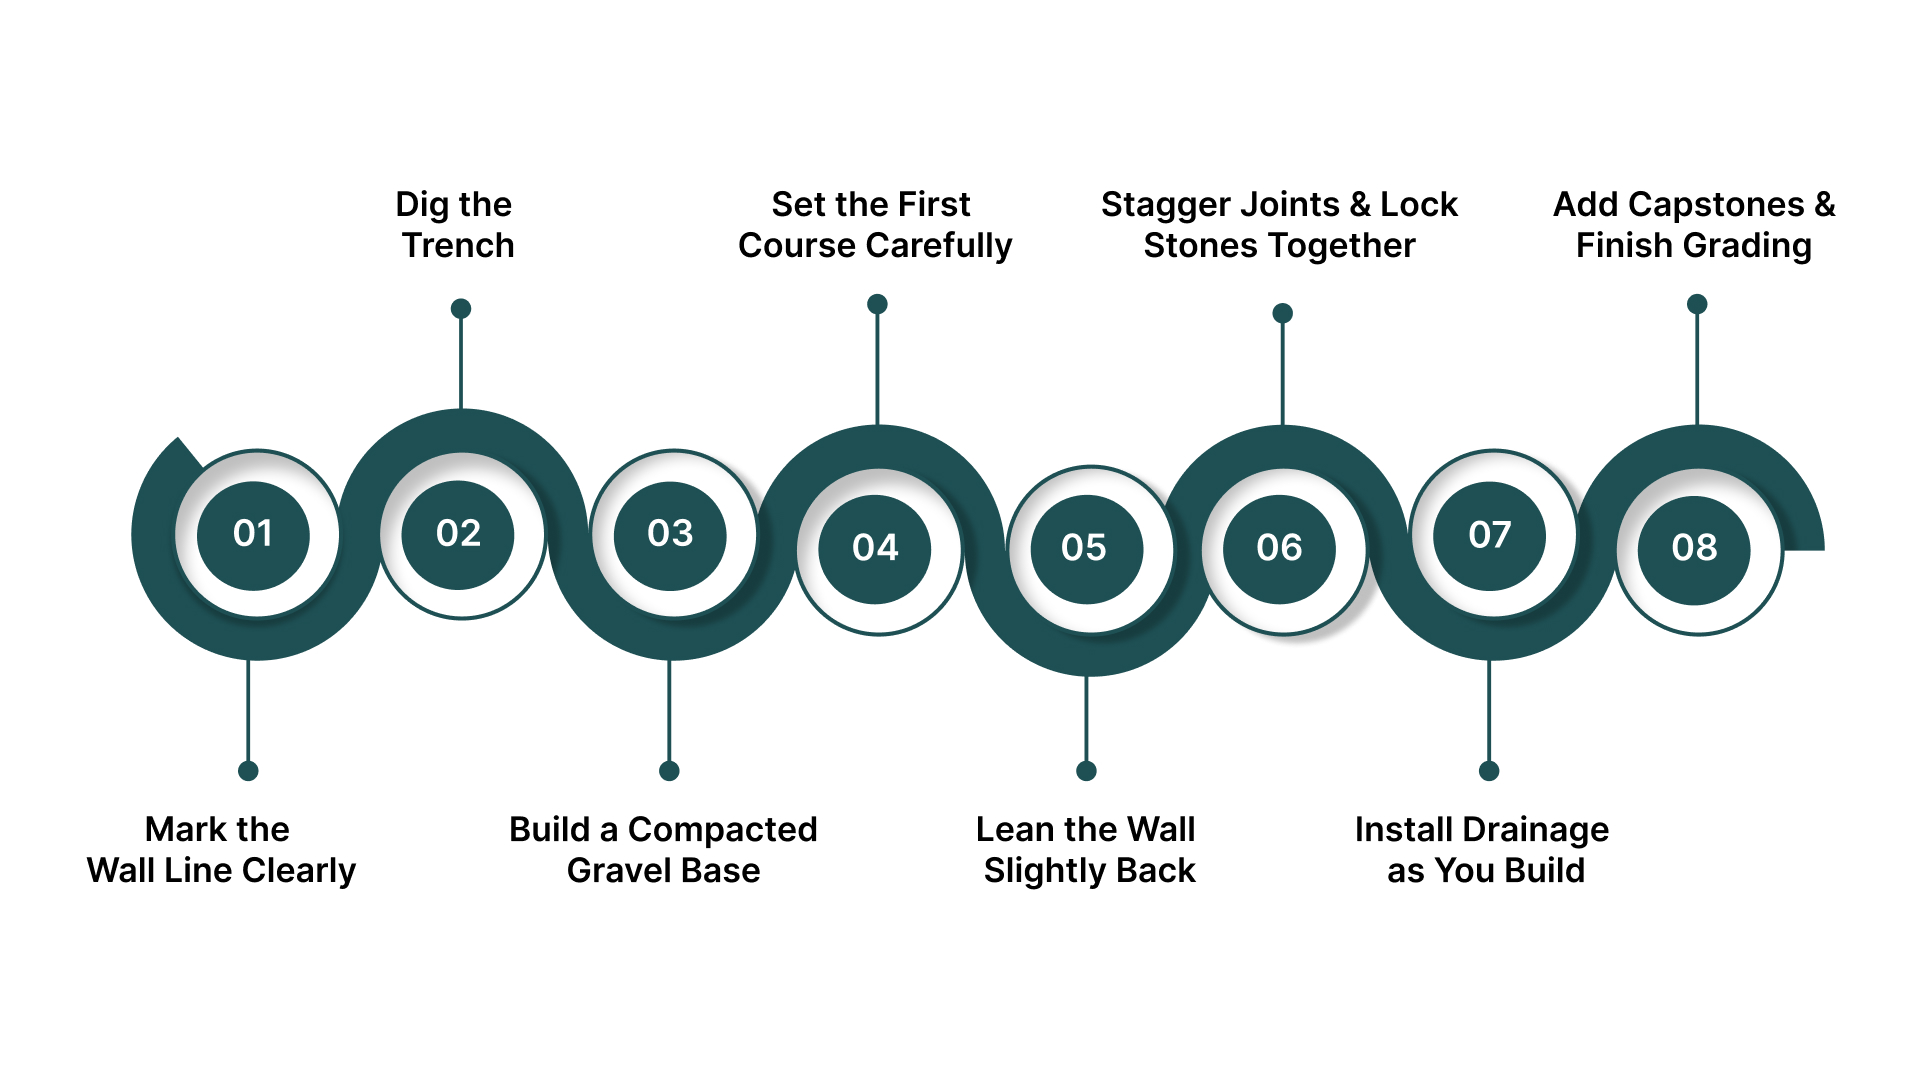
Step 1: Mark the Wall Line Clearly
Set stakes at both ends of the wall. Run a tight string line between them to mark the front face. Use marking paint to outline the trench width on the ground.
If your wall curves, use a garden hose to shape the curve first. Adjust until it looks balanced from different angles.
Step 2: Dig the Trench
Dig a trench along the marked line. The trench should be wide enough to support the base stone and allow for proper compaction.
As a general guide:
The trench should be wider than the wall face.
Part of the first stone course should sit below grade.
The base depth should allow room for compacted gravel.
Remove loose soil at the bottom. The trench base must feel firm before you add gravel.
Step 3: Build a Compacted Gravel Base
Add crushed gravel in layers, not all at once. Spread a few inches at a time and compact each layer before adding more.
Compaction matters. Loose gravel settles later and can cause the wall to lean. Use a hand tamper for small projects. Use a plate compactor for longer walls.
Check the level as you go. The base should be level side to side and along the length of the wall.
Step 4: Set the First Course Carefully
Place your largest and flattest stones on the compacted base. This first row controls everything above it.
Set each stone tight against the next.
Use a level to check front to back and side to side.
Tap stones gently into place with a rubber mallet.
Take your time here. If the first course is uneven, the wall will show it.
Step 5: Lean the Wall Slightly Back
A retaining wall should lean slightly into the slope. This slight backward tilt is called batter.
Each new course should step back a small amount from the one below. This lean helps the wall resist soil pressure over time.
Keep the lean consistent. Check alignment with a level as you build.
Step 6: Stagger Joints and Lock Stones Together
Avoid stacking stones directly on top of vertical seams. Instead, stagger the joints so each stone overlaps the one below.
This improves strength and reduces weak lines in the wall face. Use smaller stones to fill gaps and keep the wall tight.
Step 7: Install Drainage as You Build
Do not wait until the wall is finished to think about drainage.
Behind the wall:
Place geotextile fabric between soil and gravel.
Add clean drainage gravel directly behind the stone.
Install a perforated drain pipe at the base if water flow is expected.
Make sure the pipe has an exit point where water can drain away.
Backfill in layers and compact lightly as you go. This reduces settling later.
If your yard in Marietta or nearby areas has clay soil or heavy runoff, drainage planning becomes even more important.
Step 8: Add Capstones and Finish Grading
Once you reach the planned height, place capstones on top. Choose flat stones that sit securely.
You can use landscape adhesive on caps for added stability if needed.
Finish by grading the soil behind the wall so water flows away from it. Do not leave a dip where water can collect.
A natural stone retaining wall requires a compacted base, consistent lean, and proper drainage. If unsure, Higginbotham Designs can create a custom plan suited to your site.
Drainage Details That Prevent Bowing and Failure
Proper drainage prevents water buildup behind the wall, reducing pressure and maintaining its stability.
Why drainage matters more than you think
Water pressure behind the wall can cause:
Bulging or shifting stones
Settling at the base
Erosion and washout near the wall ends
A simple drainage setup that works for many yards
Drainage gravel: Clean gravel behind the wall instead of packed soil.
Geotextile fabric: Prevents clogging of gravel by soil.
Perforated drain pipe: Placed at the wall’s bottom to collect water.
Clear outlet: Ensure water has an exit path, like daylighting at a lower grade.
Drainage checklist you can use before finishing the wall
Ensure water moves away from the wall, not toward it.
Confirm gravel and fabric extend across the full wall length.
Verify the drain pipe leads to a proper exit.
Make sure grading doesn’t leave a low spot to collect water.
Common Mistakes to Avoid (And What to Do Instead)
Most wall failures come from a few repeat mistakes. Fixing them later usually means removing stone and rebuilding sections. Use this list to avoid wasted time and materials.
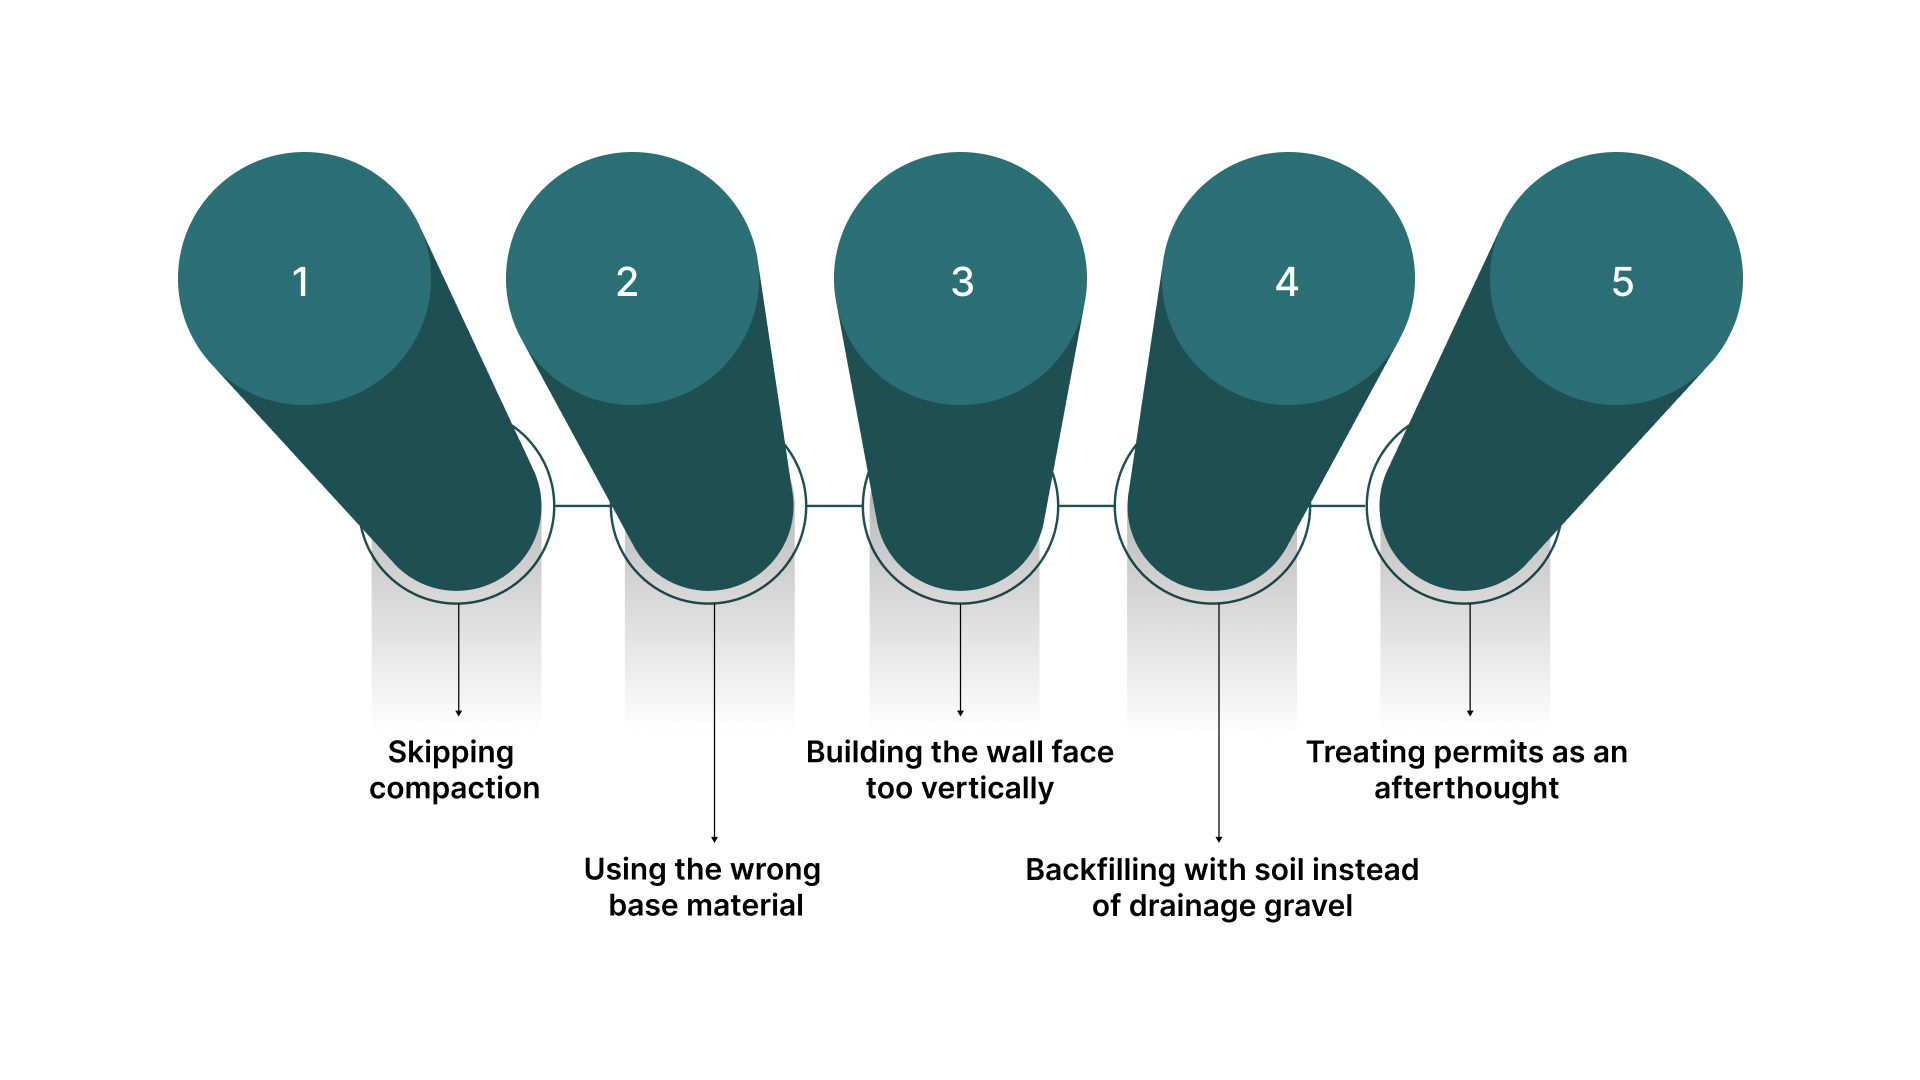
Mistake 1: Skipping compaction
Loose base gravel settles. That settlement shows up as a leaning wall or low spots along the top.
Do this instead: compact gravel in layers and check the level as you build.
Mistake 2: Using the wrong base material
Round river rock shifts under weight and does not compact well.
Do this instead: use angular crushed gravel for the base.
Mistake 3: Building the wall face too vertically
A straight-up wall is more likely to push out under soil pressure.
Do this instead: lean the wall slightly back and keep that lean consistent.
Mistake 4: Backfilling with soil instead of drainage gravel
Packed soil holds water and increases pressure.
Do this instead: create a drainage gravel zone behind the wall and separate it with fabric.
Mistake 5: Treating permits and utilities as an afterthought
Utility strikes and permit problems can stop a project mid-build.
Do this instead: handle 811 marking and local permit rules before trenching.
Now that you know how to avoid the main failure points, the next question is cost and timing, so you can plan the project realistically.
Cost and Timeline: What Changes the Price Most
The cost of a natural stone retaining wall depends on more than just the stone. Yard conditions and project specifics can impact the final price.
The biggest cost drivers
Wall height and length: More material, labor, and base work.
Site access: Tight spaces and steep yards increase labor.
Stone type: Larger, flatter stones cost more and take longer to set.
Drainage complexity: Extra work for outlets, pipes, and grading.
Soil conditions: Rocky soil or old wall removal increases effort.
Finishing work: Steps, lighting, and planting add to costs.
Timeline factors you can plan around
Delays usually stem from site prep, weather, or material availability. Frequent rain or sourcing specific stone types can add extra time.
A simple planning tip
Measure the wall length and maximum height change for a more accurate estimate.
Working With Higginbotham Designs
If you want your natural stone retaining wall to look clean and stay stable over time, it helps to work with a team that handles both design and installation.
Higginbotham Designs is a family-owned and veteran-owned landscape design and build company based in Marietta, Georgia, with 35-plus years of experience.
You get a guided process that starts with a site visit and ends with a final walkthrough, so the wall, drainage, and grading work as one plan.
Services you can combine with a retaining wall project
Outdoor living spaces
Hardscape installation
Landscape design
Landscaping
Water features
Retaining walls
Custom patios
Service areas
Marietta, East Cobb, West Cobb, Kennesaw, Smyrna, Roswell, Acworth.
Conclusion
A natural stone retaining wall holds up when the base is compacted, the wall leans back consistently, and water can drain without pressure building behind the stone. Start by confirming the wall height and the rules for your area.
Plan your layout and materials before you dig. Build in layers and treat drainage as a core part of the structure, not an add-on.

If you want a clear plan for your yard in Marietta or nearby areas, request a quote from Higginbotham Designs. You will know what is realistic for your slope, your drainage, and your budget before work begins.
FAQs
1. How deep should the first course be buried?
Plan to bury part of the first course so the base stones do not slide. Depth depends on wall height and site conditions.
2. Do you need “tie stones” for natural stone retaining walls?
In many builds, longer stones placed back into the slope help lock the wall together. It is useful on longer runs.
3. Can you build a natural stone wall on a slope that still drains toward it?
Yes, but you need a clear outlet path and grading changes so water does not collect behind the wall.
4. What is the best time of year to build in Metro Atlanta?
Dry weeks are easier for trenching and compaction. Avoid starting when the forecast shows repeated heavy rain.
5. How do you maintain a stone retaining wall?
Keep downspouts and runoff directed away, remove soil buildup at the top edge, and watch for early movement after storms.